Spanish Civil War Caudron 600 in 1/72 VOL.II
Another Spanish Caudron C.600 by Péter Kormos!
There were(are?) some inherent bad myths in the hobby that I kept on hearing and hearing and quickly embedded into my thinking when I was a youngster. Such things were for example the natural metal finish (NMF) or full resin kits. When I first painted my NMF kit, my immediate feeling was: “this wasn’t that hard, what’s all the fuss about?” This was 23 years ago. But the boogie man about full resin kits was still hiding in my closet up until recently. I kept on seeing badly fitting, poorly detailed exotic subjects, where the ratio of success and sucking went to the extreme. That’s what I saw at friends’ modeling desks and all kinds of real comments from modeling forums not the reviews that label most resin sets as at least recommended… arghhh…
All this remained until the advent of 3D printing. 3D and the computer aided design (CAD) means to me – as an engineer – precision.
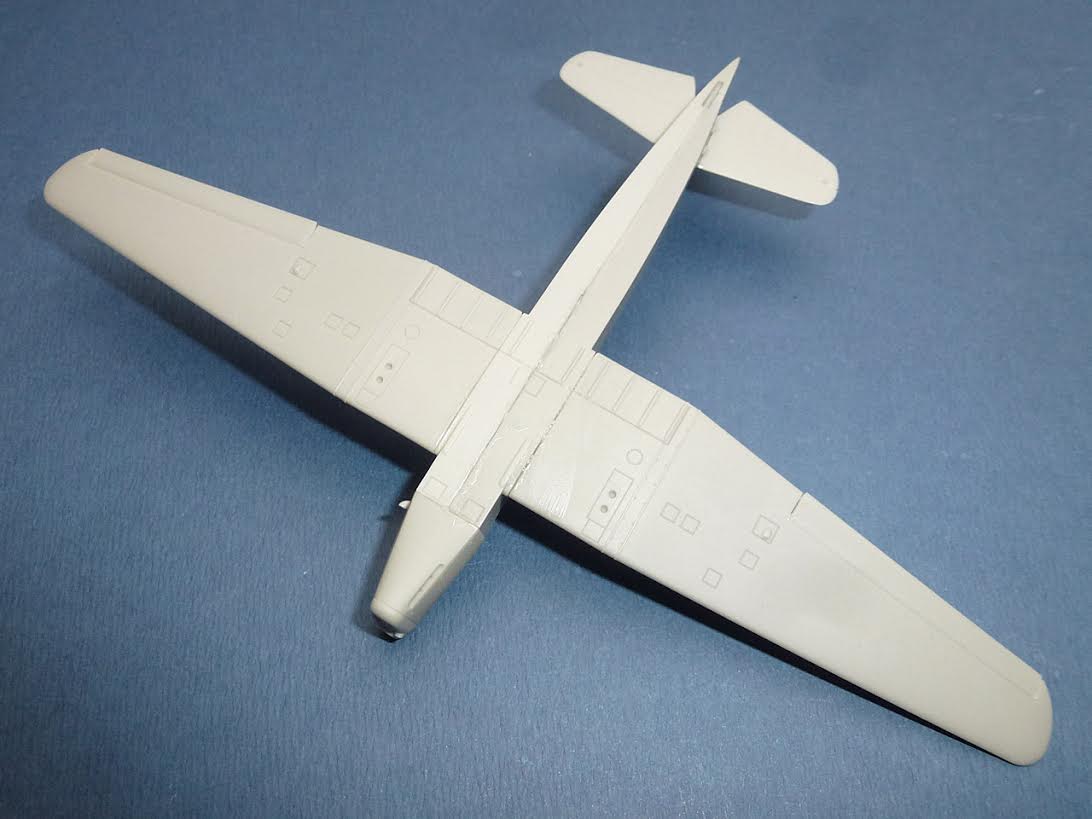
All my fears about full resin kits quickly evaporated when I first saw a 3D printed SBS kit. I knew it was 3D printed so I thought there would be NO fit issues and I saw the castings and they were immaculate! No scratches, no flash, and the detail was so rich that I didn’t expect any hassle i.e. to carve out a main wheel out of a resin blob that’s hard to distinguish from the molding block, etc. etc. So it was love at first resin-sight and decided it was time to build my very first full resin kit and it was the Caudron C.600 kit! WOW!
OK… we all know this feeling. Buying a new kit… excitement factor is at 100% … and then it quickly starts to decline when the modeler starts to fiddle with dry fitting on the 2nd day of construction. Now folks, for me it didn’t happen! I sat down at the bench and in a few hours all the casting blocks were gone, all the resin parts were prepared for painting or later assembly and all the possible parts were glued together for the very first painting session. And all this at day 1! Wow… Wow squared!! … for me who cannot finish a model in a year!
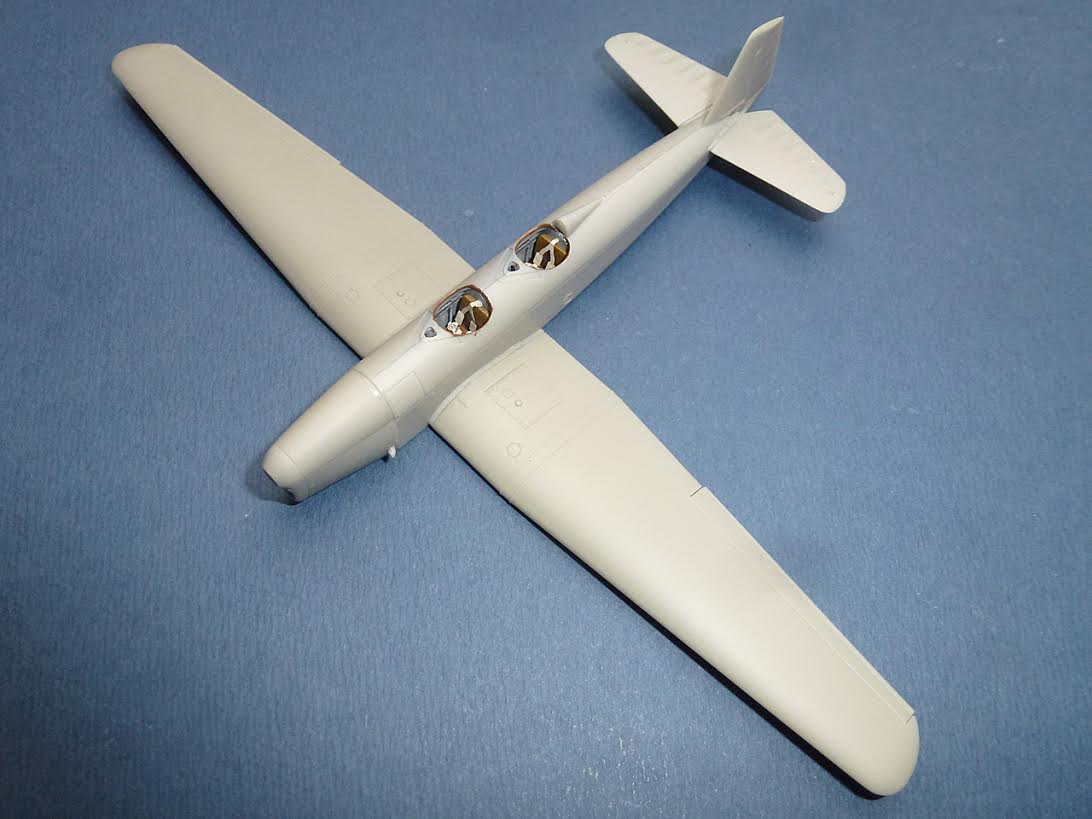
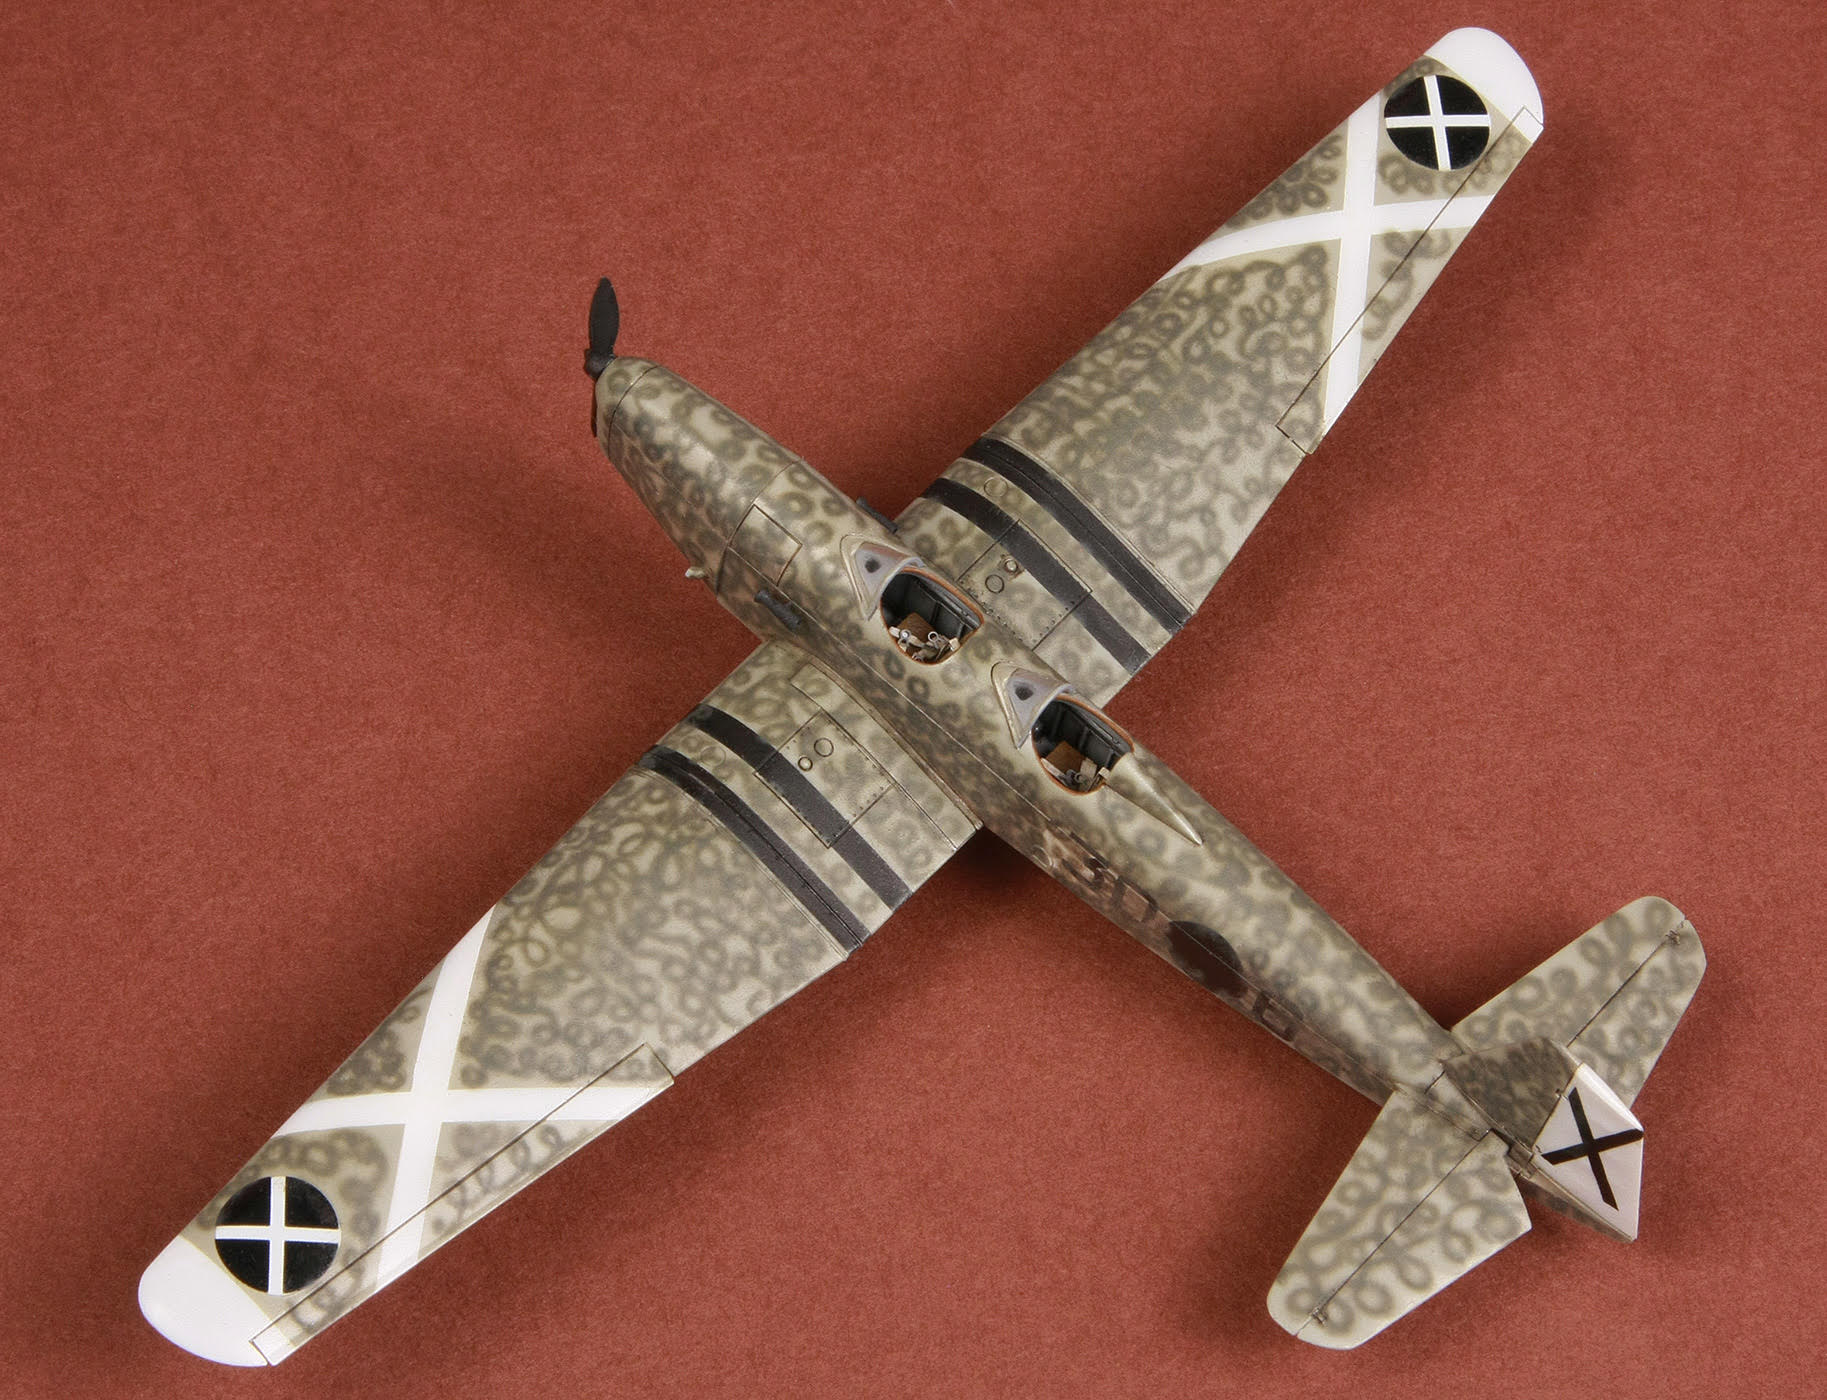
Unfortunately the kit doesn’t have any instructions for the interior colors so I spent some days searching the Internet for references. Eventually I ended up with Gunze’s neutral grey for the cockpit with some wooden chips here and there because most of this area was made out of wood. The control devices were painted black and the seat cushions leather brown.
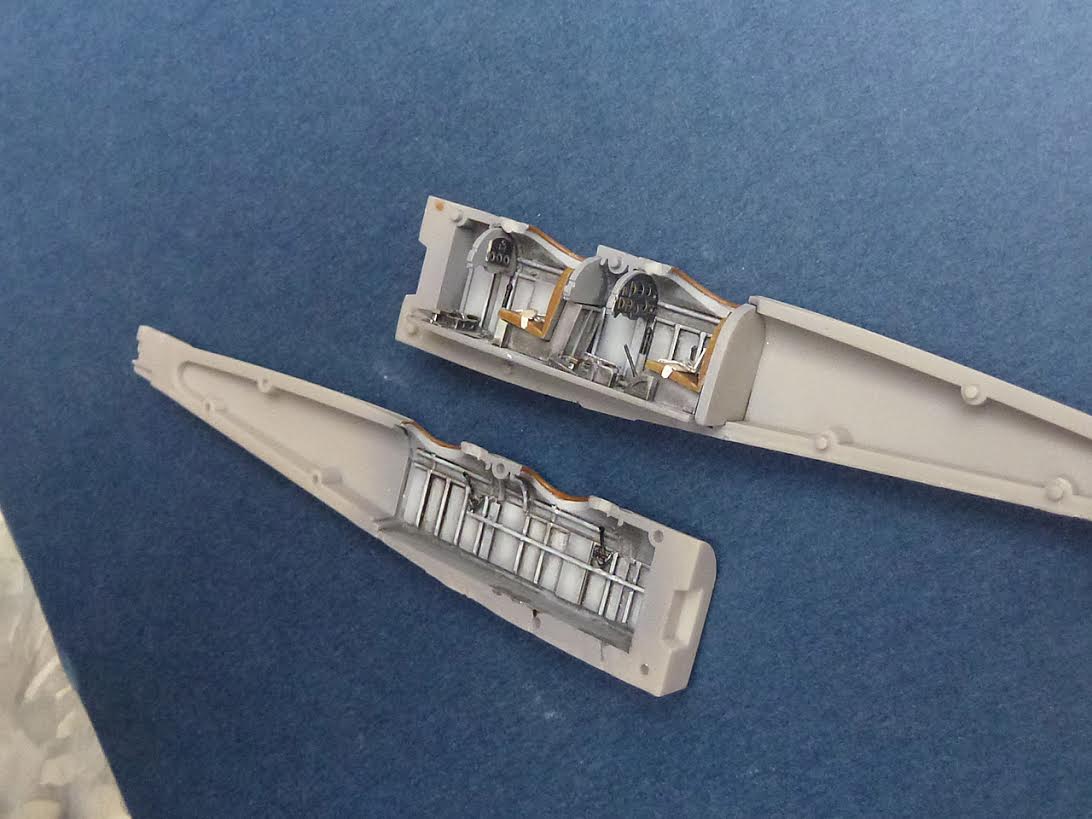
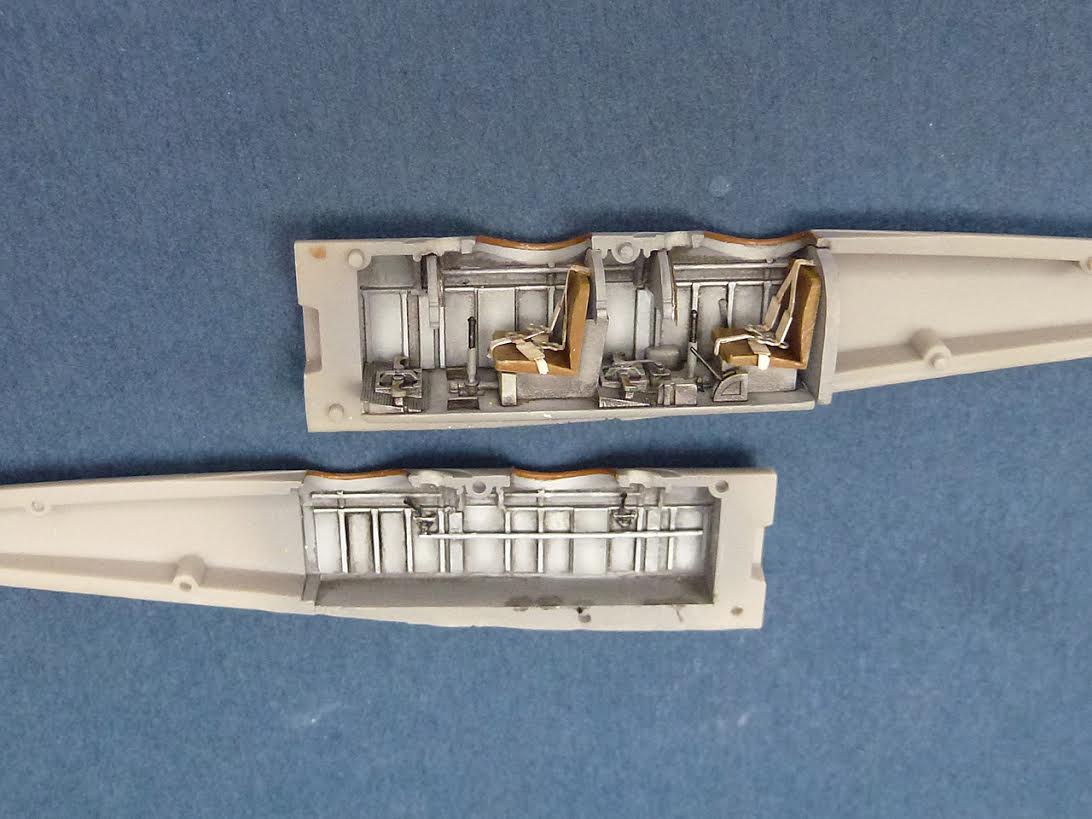
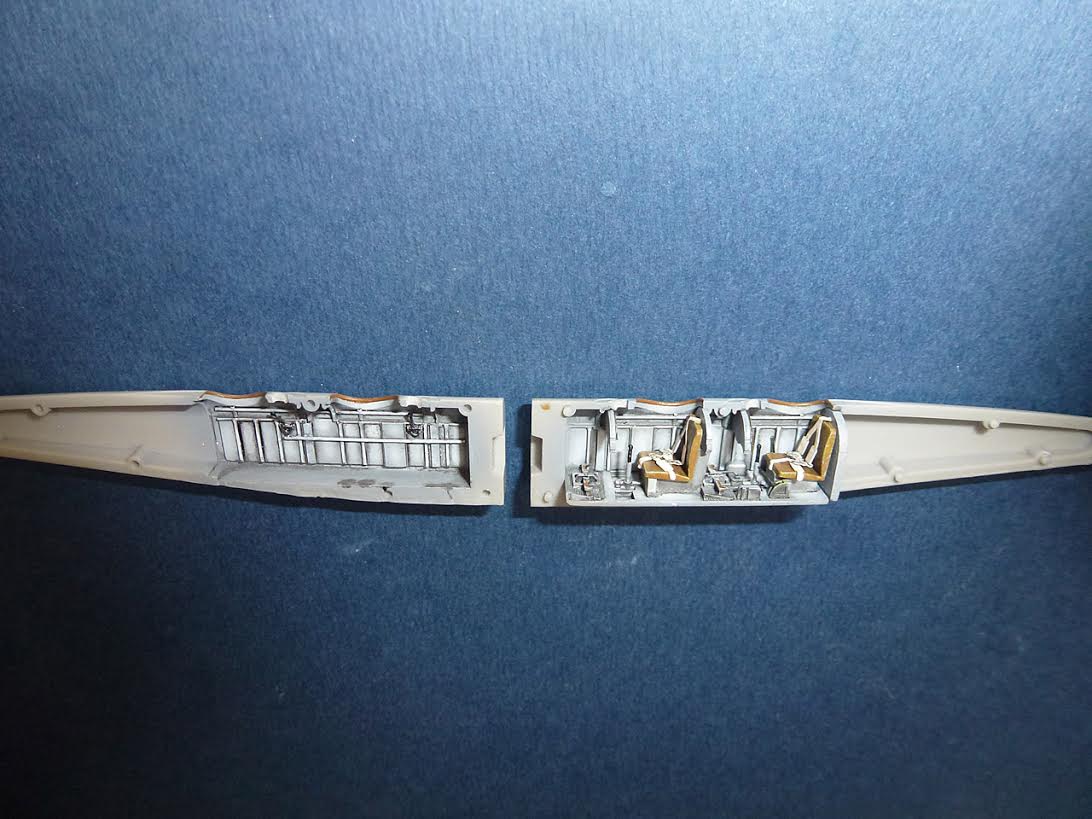
Once the interior was finished, I assembled the main parts with super glue. Unfortunately there was something wrong with the cockpit floor and it didn’t allow the fuselage halves to meet properly on the bottom that otherwise fit perfectly without this piece… A bit of head scratching, but then decided to glue the parts together as much as they allowed and used a bit of filler where necessary.
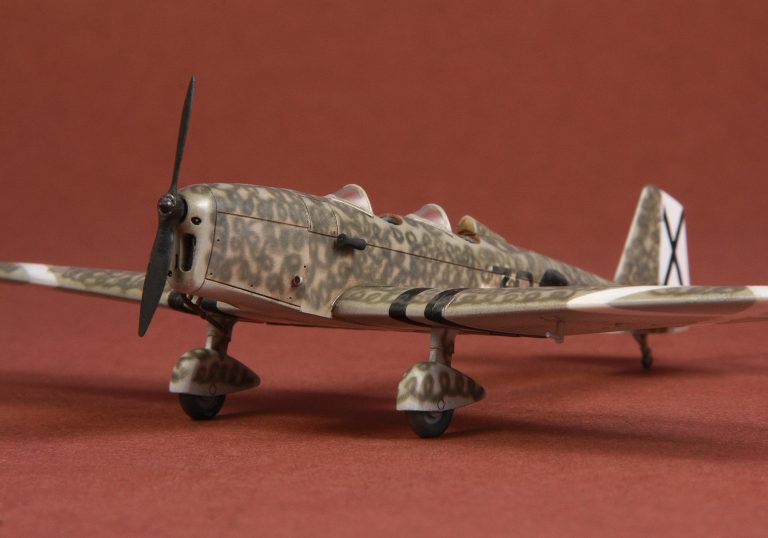
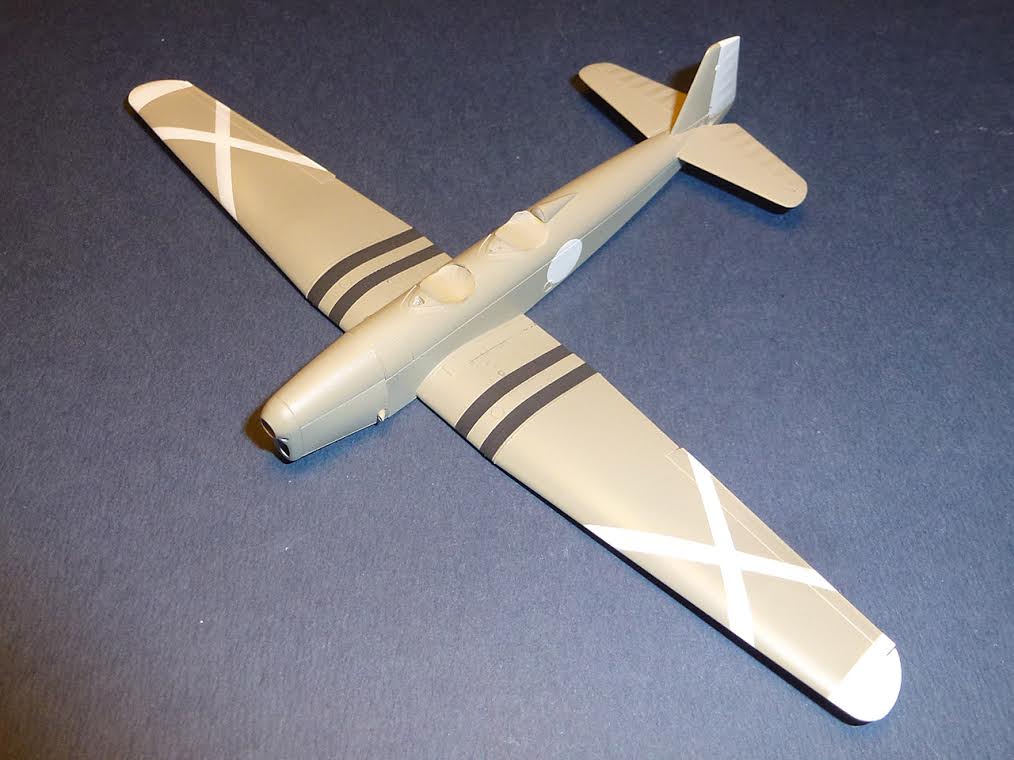
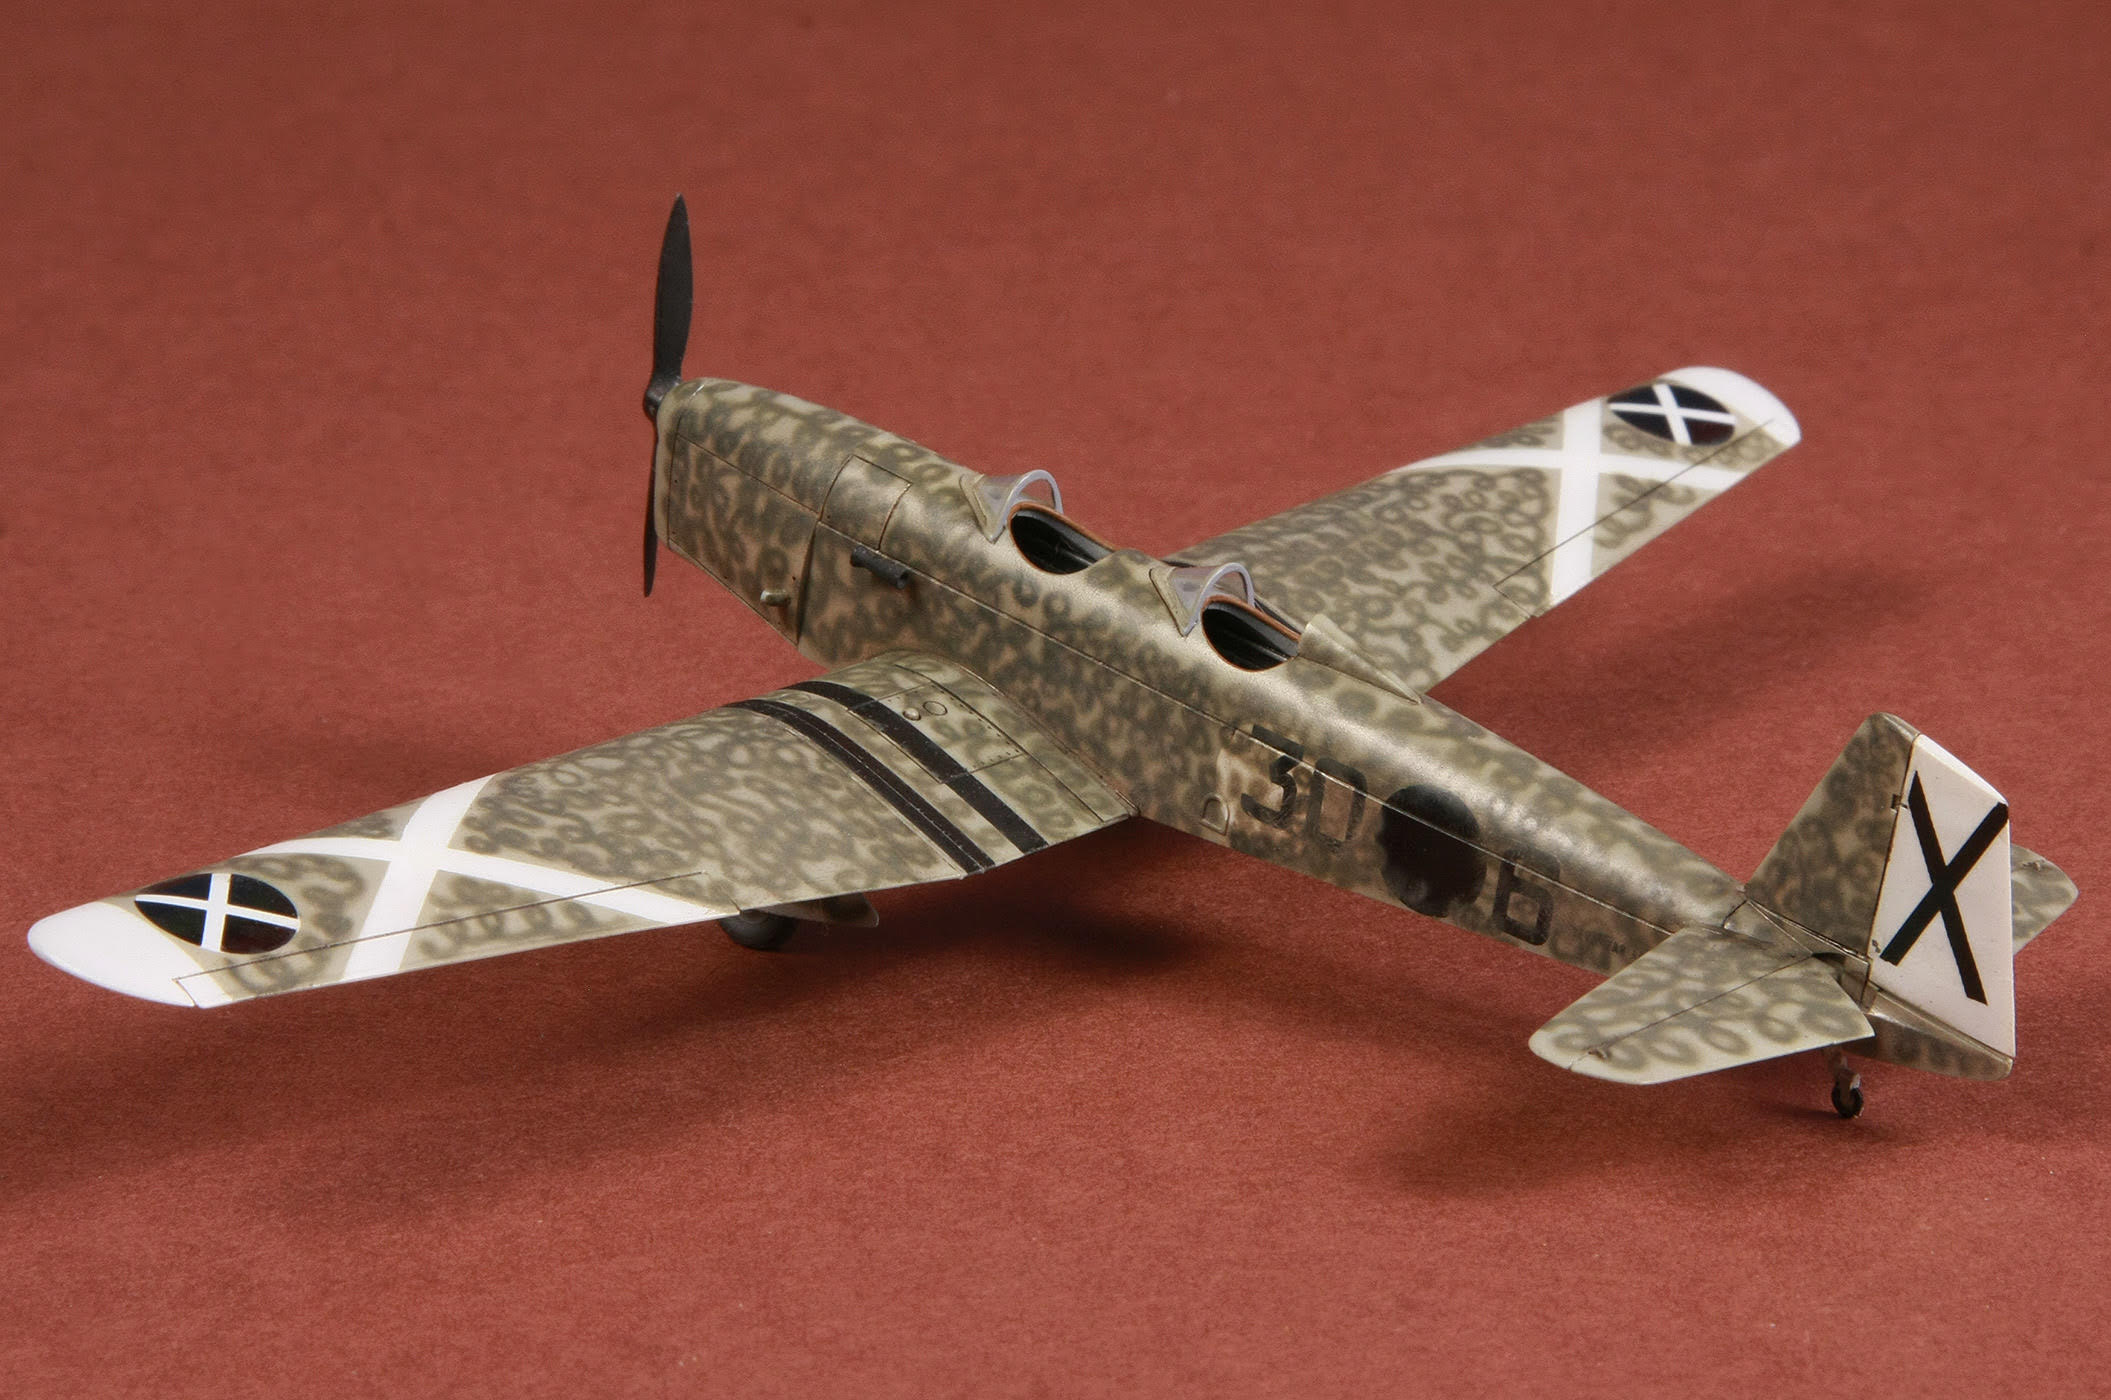
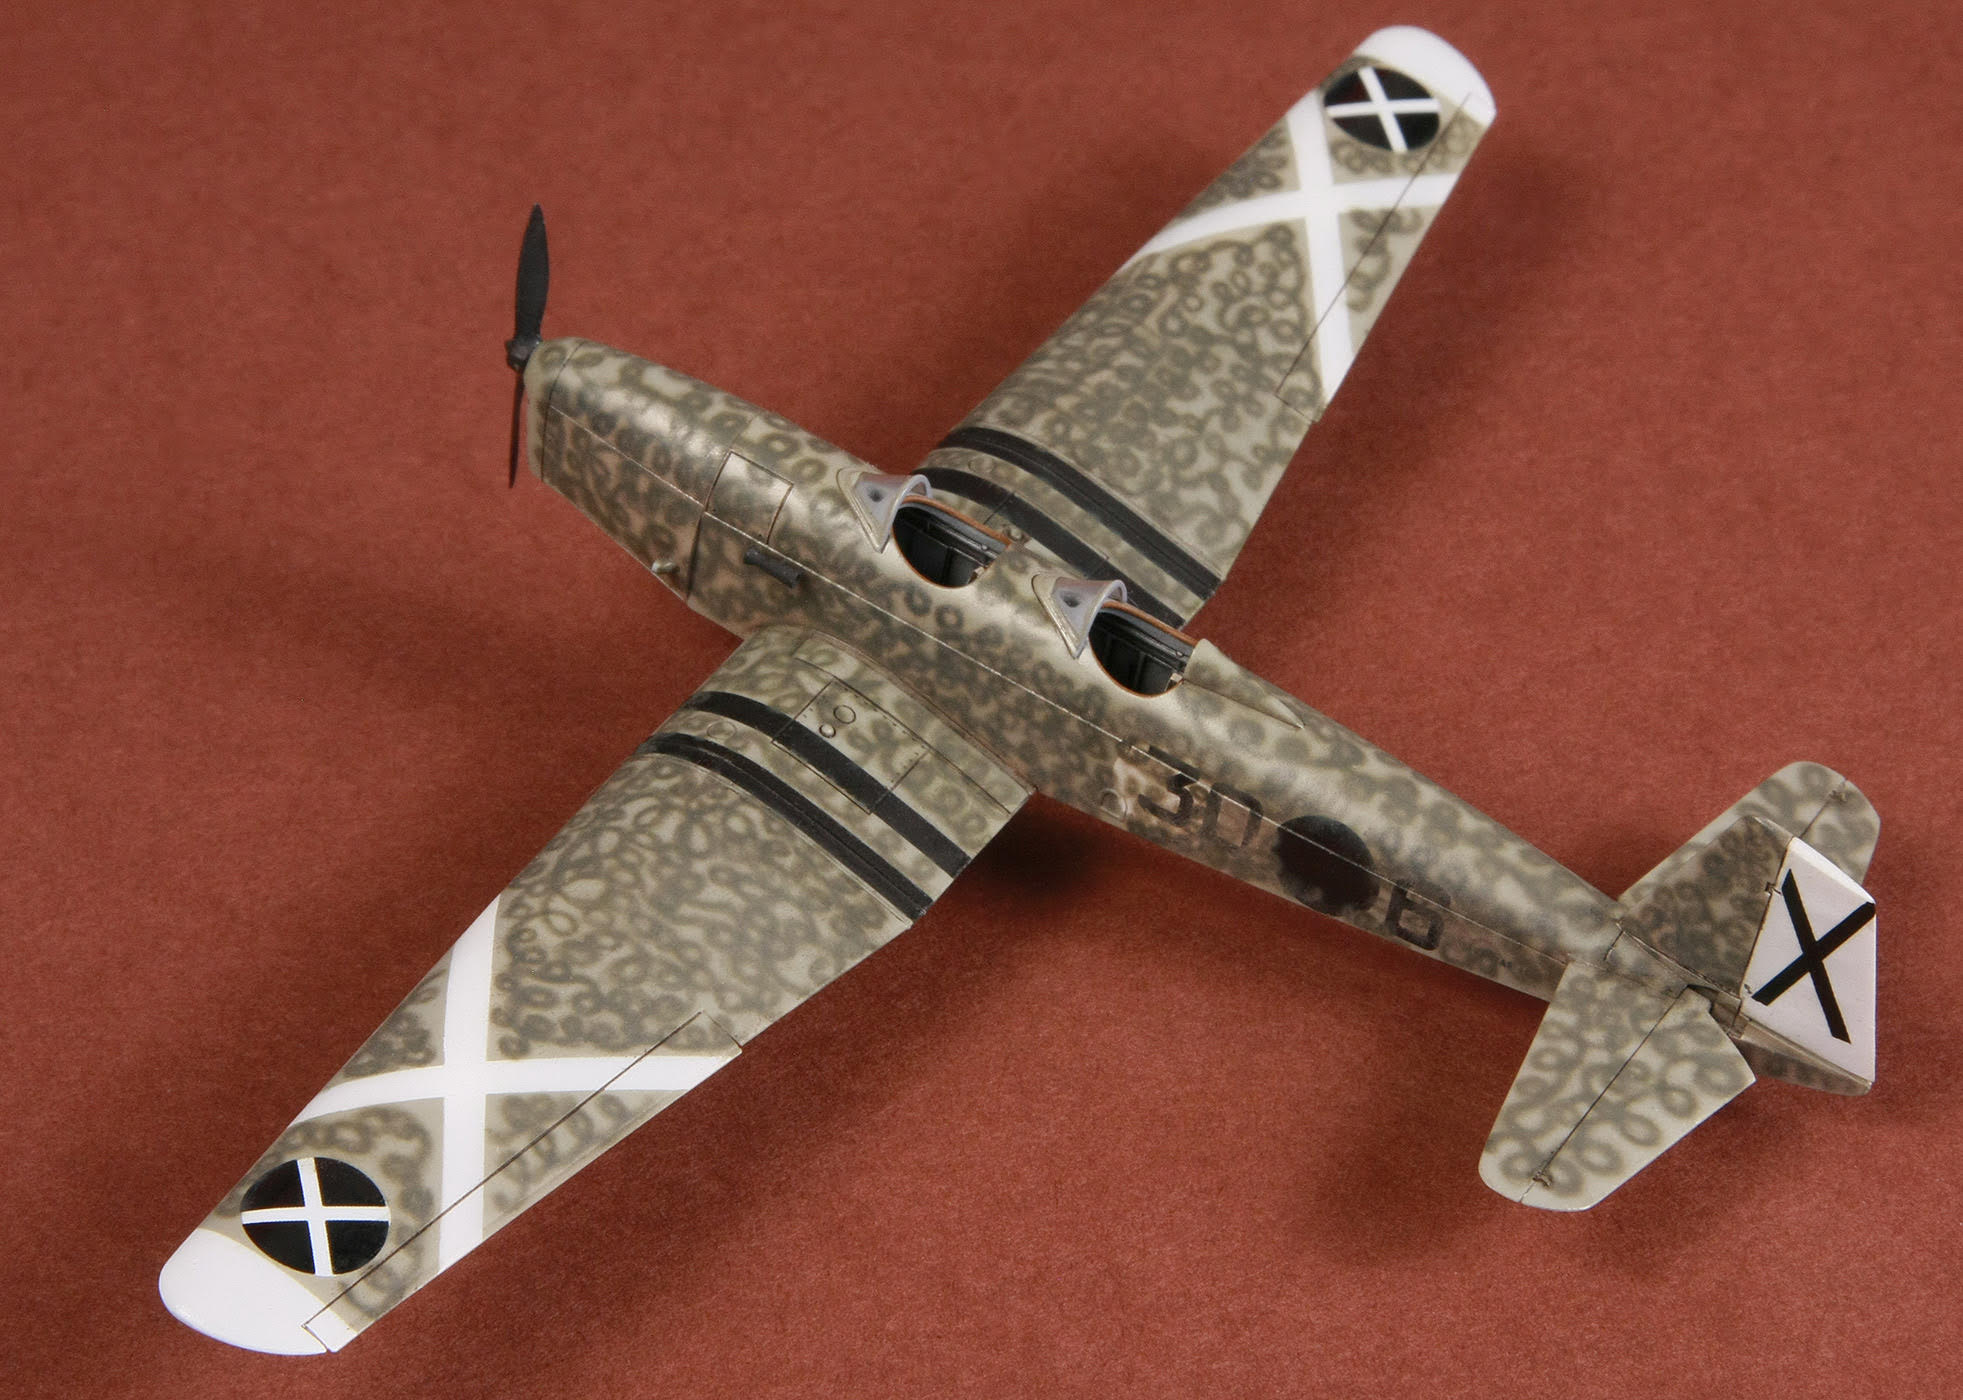
For painting, I wanted to do a challenge camo, and that’s why I decided to make a Spanish civil war squiggle pattern oversprayed look.
Painting started with the traditional order; light to dark colors: white – RLM65 – RLM 02 – black and then RLM71 for the squiggle. All went well and easy except for the squiggle that was really a challenge to spray for me in this scale.
Minor details like the venturi tube or propeller were added last to avoid damage to these delicate parts.
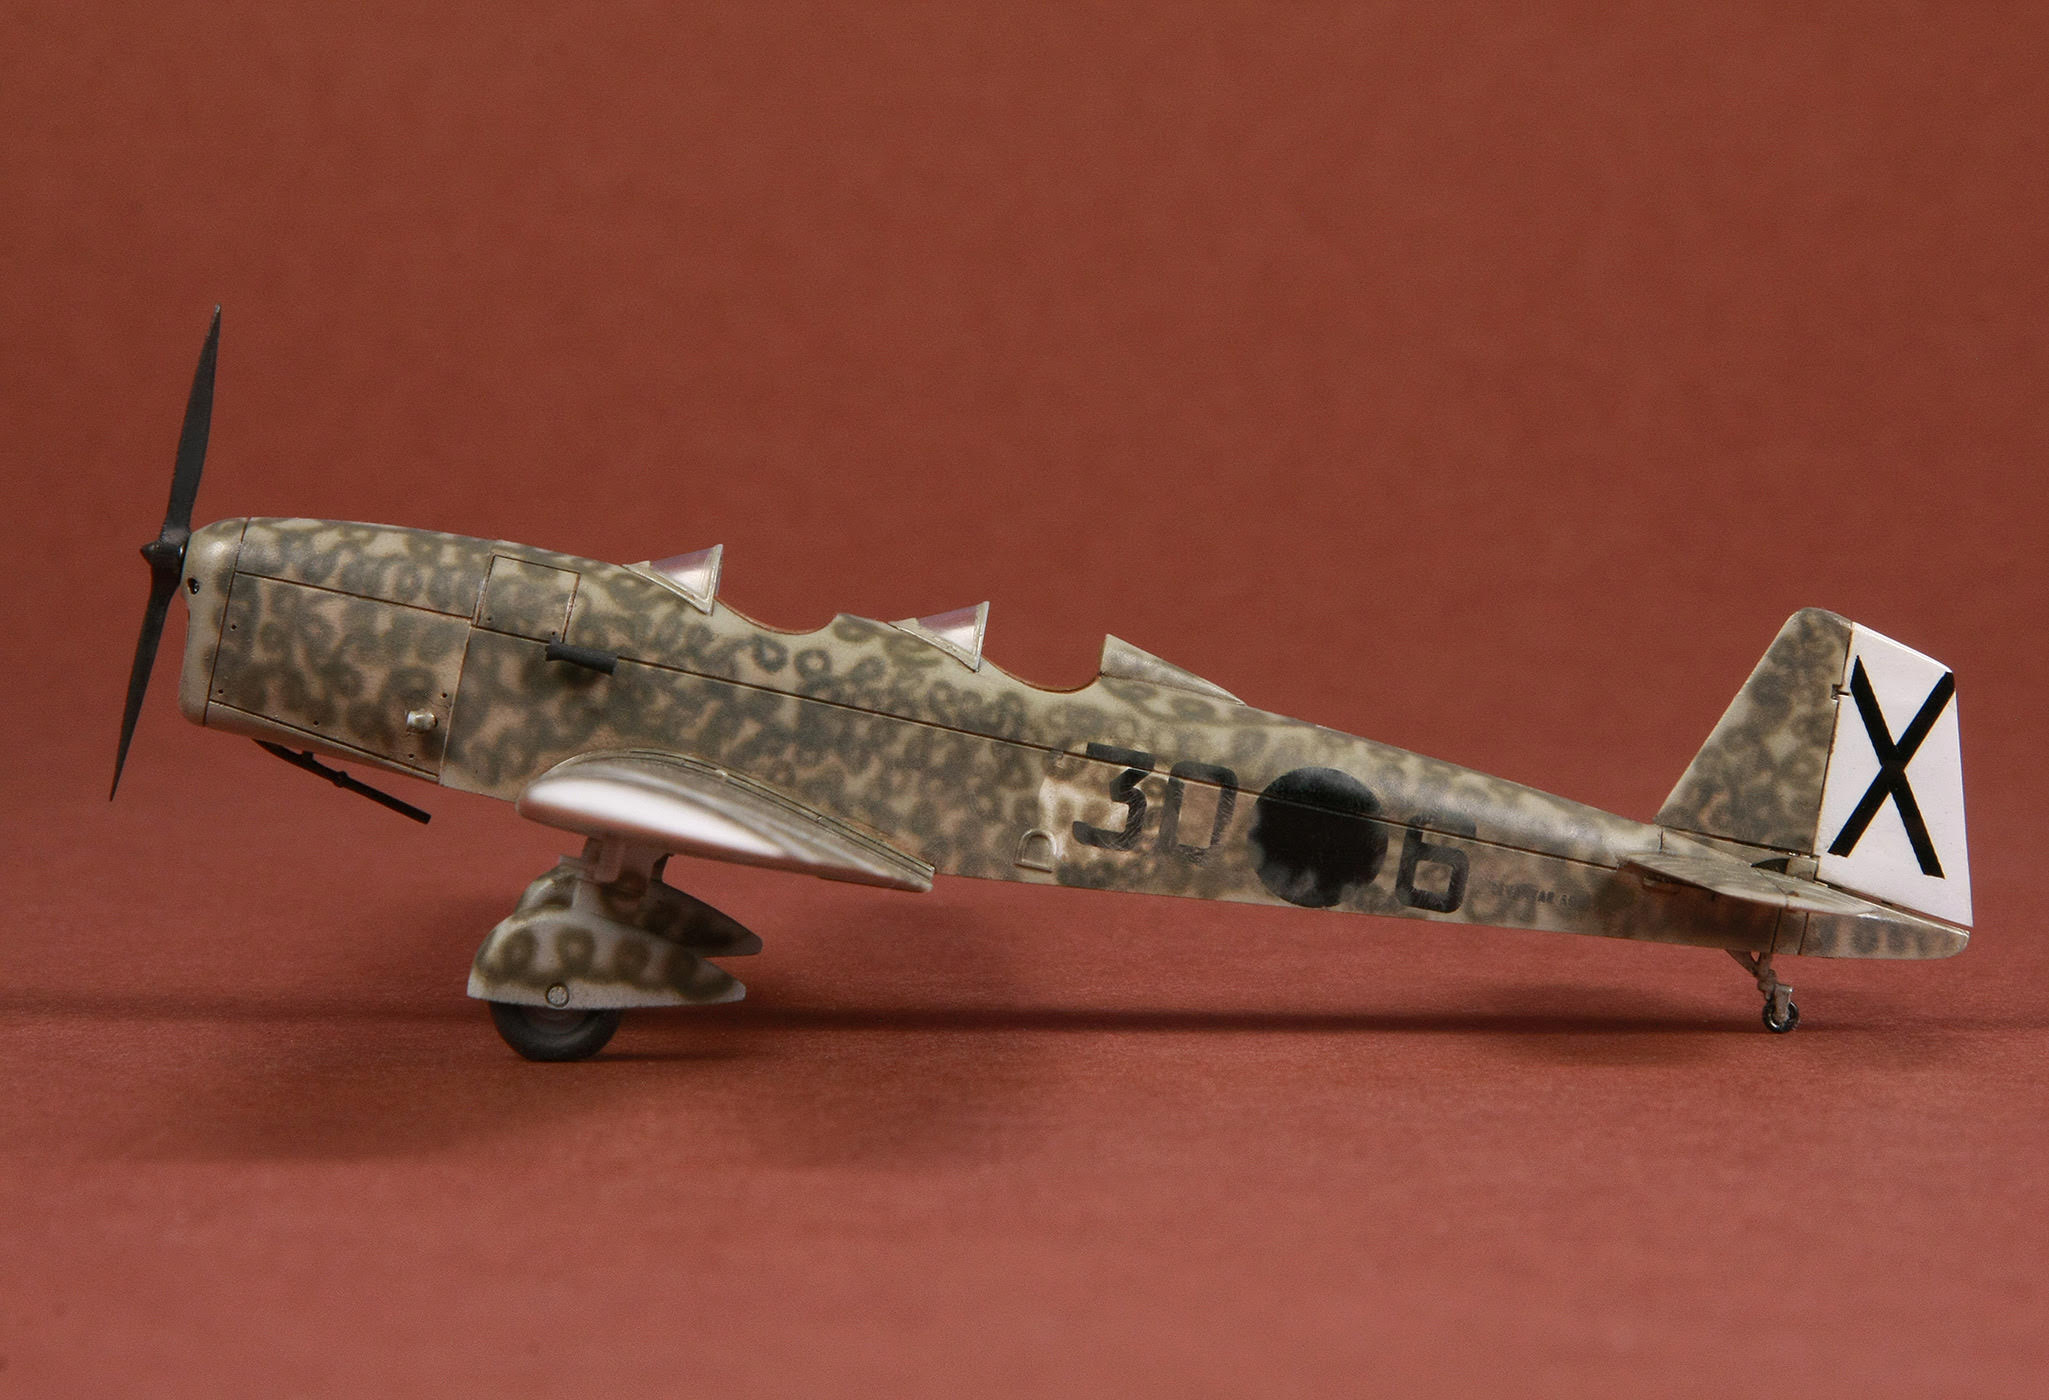

Start to finish for this kit was only 3 weeks! 3 weeks!!! I never had such a pleasure and quick build like this apart from Eduard’s I-16 Rata that I finished in such a small time. I’m very happy that I eventually ventured into the full resin world and from now on definitely look forward to SBS’ other releases that might end up again on my workbench table.
Leave a Reply Cancel reply
Send Email
Recent Posts
Recent Comments
- Sudesh on Overhaulin’ the King Tiger sprocket
- Roman on How to work with acetate canopies and windscreens – part one: glue
- Csaba on Overhaulin’ the King Tiger sprocket
- Koos van der Merwe on Overhaulin’ the King Tiger sprocket
- Vladimir Kafka on Spanish Civil War Caudron 600 in 1/72